
So hubby and I decided it was finally time to actually do some sort of makeover of our master bathroom. It wasn’t a big space but it certainly wasn’t a nice one either. The only thing acceptable in it was the shower itself. Somebody had obviously recently renovated it. Not necessarily in my choice of colour, but it was certainly good enough for us not to worry about ripping it up and starting over. This isn’t our forever home. We did however desperately want to get rid of the god-awful brown square tiles covering the floor and the lip leading into the shower.
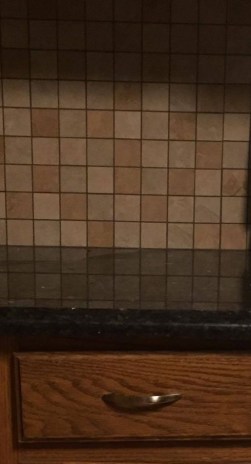
I am reasonably sure the man who lived in this house prior to us, had absolutely no taste whatsoever, and I mean that in the nicest possible way. We have seen numerous examples throughout the house proving this point. Just look at the backsplash (almost identical to the bathroom tiles) and countertops in the kitchen:
I’m not sure if he was doing everything possible to eradicate everything even remotely feminine in this house (apparently they went through a pretty nasty divorce after he told her to leave because he had found “the love of his life”)! I mean he seriously sounds like such a dick anyway! Good riddance! And good riddance to the ugly brown tiles throughout the house that don’t match anything else.
Back to the bathroom: we had decided on the LifeProof vinyl flooring planks, having been very impressed by the way they’ve held up over the past year in our basement. We love the colour too (seasoned wood) and it looks amazing with blue paint (& every other colour too)! Here’s a link to it at the Home Depot: LifeProof Seasoned Wood multi-width vinyl flooring (and no, I’m not getting paid by them to share this link with you, though I wish I was! lol)

We knew how durable the vinyl flooring was because we used it in our basement renovation over a year ago and it has withstood three kids, a dog, a cat, numerous guests (the guest room and spare bathroom are down there) even some drunk people – yes, the bar and pool table are also down there! 😉 I was actually originally toying with the possibility of using the travertine, like I had done in the kids’ bathroom, but decided against it because of what a pain in the arse it became when I actually renovated the bathroom from hell (aka the kids’ bathroom). I didn’t want to rip out the existing tile, I wanted something easy to lay, was reasonably priced and was also durable – unlike the flooring we had put throughout the main level that looked beautiful at first, but damaged the minute you breathed near it (Here is a link showing some of the ‘wear and tear’ on this flooring. Do NOT buy this product, you will regret it and the company – Harmonics, holds no liability, blaming the installation process for everything! This was the Harmonics Spiced Applewood Laminate Flooring from Costco.)
Normally, you don’t need to lay any underlay underneath a vinyl flooring but because of the square tiles, I decided to use a vapour barrier one I had found on Amazon to help even out the uneven divides between each 2×2 inch tile. It obviously need to be something that could go in a bathroom, so this one was perfect: 3in1 Silent Vapor Barrier Flooring Underlayment w/overlap and tape 100sq.ft by Feather Step and you can’t beat the price at $18 for 100 sq. ft! Be prepared though, it does smell a bit when you open the packaging up.

The next thing you need to do is to work out how your flooring is going to lay. Because the Seasoned Wood Vinyl Flooring planks come in multi-widths, we had to plan this out in advance to get minimum waste. I suggest you do the same thing. Here is a time lapse video link to us laying the floor : Bathroom floor laying. So, the first thing I need to clarify is that we do have the vapor barrier upside down in this video. We did eventually reverse it, but it was a long process and quite frustrating, so I didn’t get video footage of that. Remember, silver side down.
The next problem we had was the super weird, ugly shower lip. Why would you put those ugly floor tiles going up the edge of the newly renovated shower? A normal person would have gotten rid of that, but not our guy! Probably because it was a tad too hard; it certainly puzzled us for a while as to how we were going to get rid of them without removing the tiles (we would have to do it all if we removed these ones).

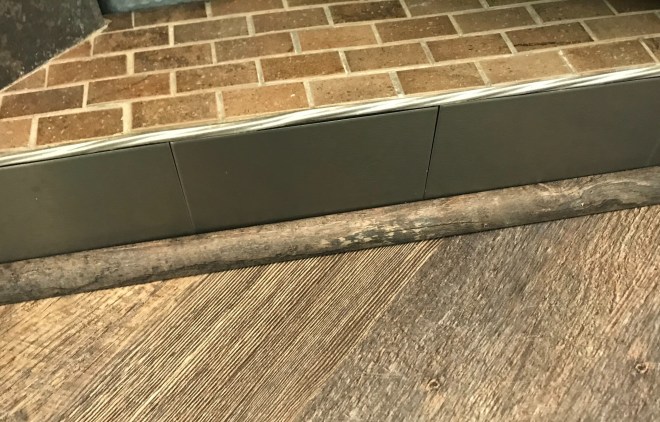
Hubby suggested using baseboard, but I was very concerned about the moisture getting into it, even after I coated it with spar urethane (a special urethane that is used for sealing wood in areas where it will be exposed to water or strong sunlight). We tried it nonetheless and it looked like crap to be honest. I bought a couple of different types of tiles, but we needed something big enough and with nice enough edges, that it would look good on the top where it met the other tiles from the shower, or we needed something to finish it off. It was really a matter of trial and error. We had decided to use the Aspect Peel and Stick backsplash stainless long grain metal tiles behind the countertop (hubby’s suggestion) so I thought it might be a good idea to use these down the bottom of the shower, where it met the floor. But how to finish the edge off and cover the little bit of exposed ugly tile? I searched through the house looking for something I could use when I found it!!!
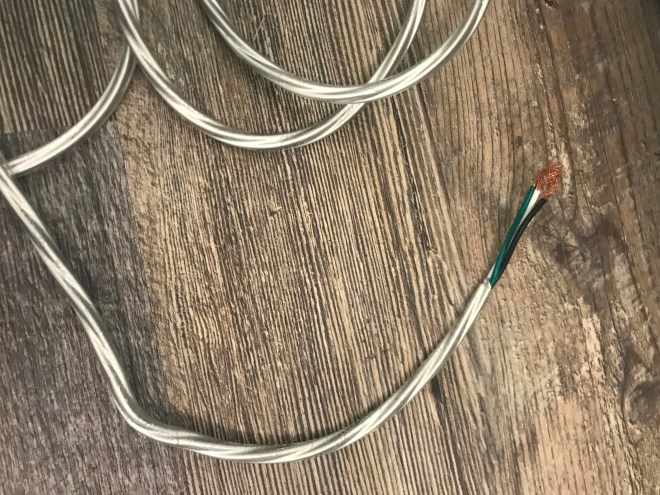
Yes, that is leftover wire cord from an IKEA light! If you look closely you can see that the outside is actually covered in plastic, it was surprisingly flexible too. I straightened the cord out, sealed the ends by melting the plastic for a split second and glued it on with a waterproof glue and Voila!


We love our new bathroom floor!
If you enjoy reading my crazy, varied blogs, please subscribe here on WordPress. Sharing is caring, so feel free to share with your friends. I’m on Facebook: Aussie Mum’s Adventures. Come like my page and share it with your friends! You can find me on Twitter: @ozmumsadventures, on Instagram: Ozmumsadventures, on Pinterest: Aussiemumsadventures And please subscribe to my YouTube channel: Aussie Mum’s Adventures (I’m still working on it, so please have patience with me!).

